Let me just start by saying I am soooo glad Halloween is over!! I am so not a fan of ghosts, witches, skeletons, zombies and other ewey, scary stuff! I feel like as soon as October (or even sooner!) starts I, as a mom, have to be on the look-out. When we walk in to a party store, craft store, Target, etc there are images that my kids are scared of and things I just don't want in their little minds. I'm constantly avoiding certain places or telling my kids to cover their eyes as we walk through. Then, don't get me started on kid TV! My "safe" shows for my kids are no longer safe and my kids don't understand why I won't let them watch certain things.
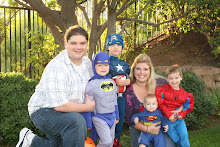
Now, don't get me wrong, I LOVE dressing my kids up! This year they were all superheroes: Captain America, Batman, Spiderman and Superman. So cute, so fun! THAT is what Halloween is about for me and my family, just a fun time to dress up and let my kids (and me) eat lots of candy!
Then, what happens November 1st? It's like Fall is over. Pumpkin patches are closed, pumpkins go on sale and stores move all their Fall stuff out in order to make room for Christmas! Again, I am so excited for Christmas. BUT, what about THANKSGIVING!?!?!?!
I LOVE Thanksgiving, it is a time to reflect about how blessed I truly am. I saw some others doing #novemberthankful on Instagram and decided to join in! Every day during the month of November you post a picture of something you are thankful for. It can be a full night of sleep, coffee, a picture showing God's grace, or anything in between. What a great idea! As much as I am looking forward to Christmas and the birth of my Savior I am going to take this time to be thankful every day and to remember that all of my blessings come from my Lord and Savior. So, join me in keeping Fall alive a little longer and make my delicious pumpkin french toast below!
Pumpkin French Toast
1 loaf white bread (I used french toast bread)
3/4 cup pumpkin puree
1 cup milk
4 eggs, beaten
1 tsp vanilla extract
3/4 cup brown sugar
1 tsp cinnamon
1/2 tsp ground nutmeg
1/8 tsp salt
Maple syrup and powdered sugar for serving
In a shallow bowl (I use a pie plate) whisk all ingredients besides the bread. When combined well, put bread in mixture to soak it up, make sure you turn so both sides are coated. Heat a non-stick pan or griddle and lightly coat with butter or cooking spray. Put pumpkin coated bread in pan and turn the heat to low/med-low. Cook until nicely browned and then flip. Cook until both sides are browned and serve with maple syrup and powdered sugar :) This is super yummy and a great way to enjoy FALL!
Showing posts with label thanksgiving. Show all posts
Thursday, November 8, 2012
Thankful...and pumpkin french toast!
Wednesday, November 23, 2011
TURKEY, TURKEY, TURKEY!!!!
Casey and I have been married for 6 1/2 years and I think he has worked every Thanksgiving since we have been married :( It's a bummer, but such is the life of a chef. His favorite holiday also happens to be THANKSGIVING!! So, every year I make a Thanksgiving meal for our little family at home. It started with just the 2 of us and its hard to believe next year there will be 6 of us! I will admit, my first year making a turkey I was sooo intimidated. I mean, turkeys are hard to cook, you want crispy skin, juicy meat, flavorful and looking good. I will let you all in on a little turkey secret the restaurants are hiding from you. When they make big thanksgiving meals many times they cook the breasts and thighs separately so that they can achieve the perfect temperature without drying out the meat and then they present one whole turkey to the table that is golden brown (that will probably not ever be eaten)!! However, because I have an amazing chef at home, and I have had plenty of practice I have figured out how to make the most delicious moist turkey ever!!
Ingredients:
Turkey, thawed (mine was about 21 lbs)
3 sprigs thyme
2 sprigs rosemary
3 sprigs sage
4 garlic cloves
1 lemon
1 pound of butter (4 sticks)
Salt and Pepper
Injector
So, first start by take 2 sprigs of thyme, 1 sprig of rosemary, 2 sprigs sage and remove leaves from stems. Then finely chop. Next chop garlic, and zest your lemon. Melt the butter and add in chopped herbs, garlic and lemon zest. Now use your blender (or a stick blender) to puree the butter mixture, you need the herbs sooo small so they don't clog your injector. Rinse your turkey and pat it dry. Tie legs or tuck them under (mine was done for me when I opened the package, yay!) And flip the wings under the bird. Place it in your roasting pan (mine is non-stick which makes it soooo easy to clean!)Now its time to start filling your syringe and injecting your turkey!!
I recommend an injector like this:
So, fill your injector and start injecting your turkey, make sure to do a few in the legs and thighs, but the majority of it into the breasts. Then generously cover your turkey with salt and pepper. Fill the cavity with your left over herbs and slice the lemon and stick that in there too. It will look like this:
Now put your turkey, uncovered into a preheated 400 degree oven. Cook at 400 for about 40 minutes and then turn heat down to 365. I did not cover my turkey at all, but if you notice it starting to get too brown cover lightly with foil. Now, here is the part that goes against everything I knew about roasting a turkey....resist the urge to baste! Just let it go as is, that is how you are going to get the crispy skin that everybody (except me) loves! And don't forget to get yourself an official turkey watcher:
Now, my bird cooked in about 3 1/2 hours for around 21 pounds. Yours might take longer, you need a good thermometer to let you know when it is done. You need the temp to reach 165 degrees. Make sure you check the thigh as well as the breast. When you have reached 165 take the turkey out of the oven and let it rest (don't cut into it!!!) for about 20 minutes. This will allow the juices in the turkey to settle into the meat. Then it is time to carve, I wish I had some special instructions for this part, but having a chef for a husband comes in handy :)
Look at the herbs in the meat, and how juicy the turkey is:
I hope you all enjoy this, and you can do the same thing with a chicken, just use less butter!
Subscribe to:
Posts (Atom)
